Getting a passport size photo online free used to mean finding a studio or a photo booth, paying ₹100-200, and hoping the photo does not get rejected. The EzyToolz Passport Photo Maker lets you do it from your phone or laptop — upload a photo, crop it to the right size, change the background to white, and download a print-ready sheet. No app, no account, no cost.
Works for Indian passport, Aadhar update, PAN card, NEET and JEE exam forms, Schengen visa, US passport, and more — each with the correct dimensions already set.
Where You Need Passport Size Photos in India
Passport photos are required for more documents than most people realise. Here are the most common ones:
| Document / Form | Required Size | Background |
| Indian Passport | 3.5 × 3.5 cm | White |
| Aadhar Card Update | 3.5 × 3.5 cm | White |
| PAN Card Application | 3.5 × 3.5 cm | White |
| NEET / JEE Exam Form | 3.5 × 4.5 cm | White / Light |
| SSC / UPSC Applications | 3.5 × 4.5 cm | White |
| Indian Visa Application | 2 × 2 inch | White |
| Schengen Visa | 3.5 × 4.5 cm | White / Grey |
| US Passport | 2 × 2 inch | White |
| UK Passport | 35 × 45 mm | Light grey |
| Driving Licence (India) | 3.5 × 3.5 cm | White |
| All these size standards are pre-loaded in the tool Select your document from the ‘Photo Size Standard’ dropdown — the tool automatically sets the correct dimensions and crop ratio. No manual calculation needed. |
How to Create Passport Size Photo Online Free — Step by Step
Step 1 — Upload Your Photo
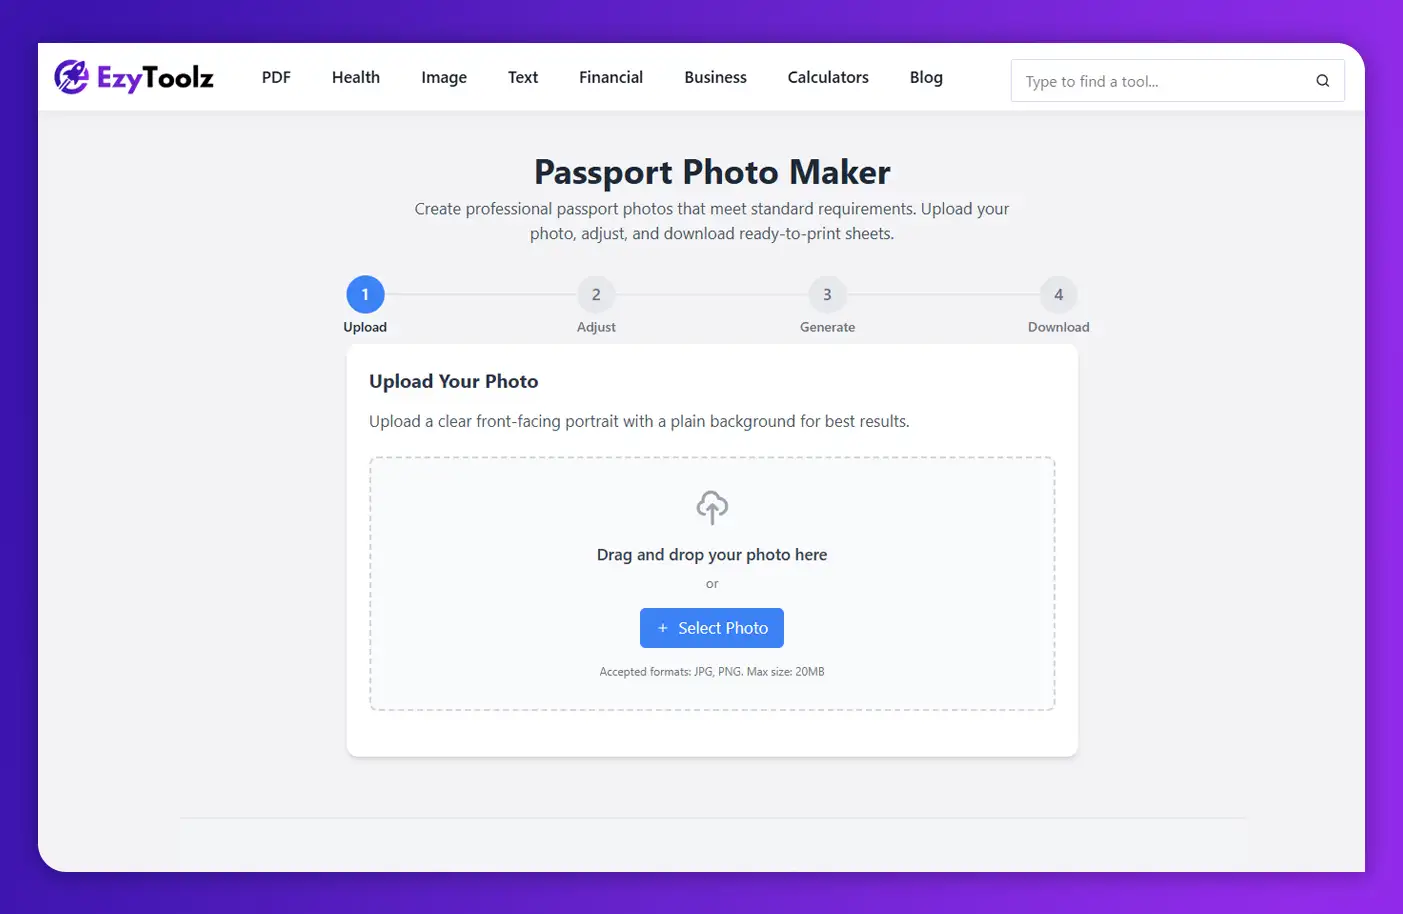
Open the tool and upload a photo from your phone or computer. Drag and drop it into the upload area or click ‘Select Photo’ to browse.
- Use a recent, front-facing photo — looking directly into the camera, neutral expression.
- Plain background preferred — white or light-coloured wall works best. If the background is cluttered, use the EzyToolz Background Remover first to get a clean white background before uploading.
- Good lighting — natural daylight or a well-lit room. Avoid shadows on the face.
| Background issue? Fix it before uploading If your photo has a coloured or busy background, go to ezytoolz.com/image/background-remover/ first. Remove the background with one click, then upload the clean image to the passport photo tool. Takes 30 seconds. |
Step 2 — Crop and Adjust
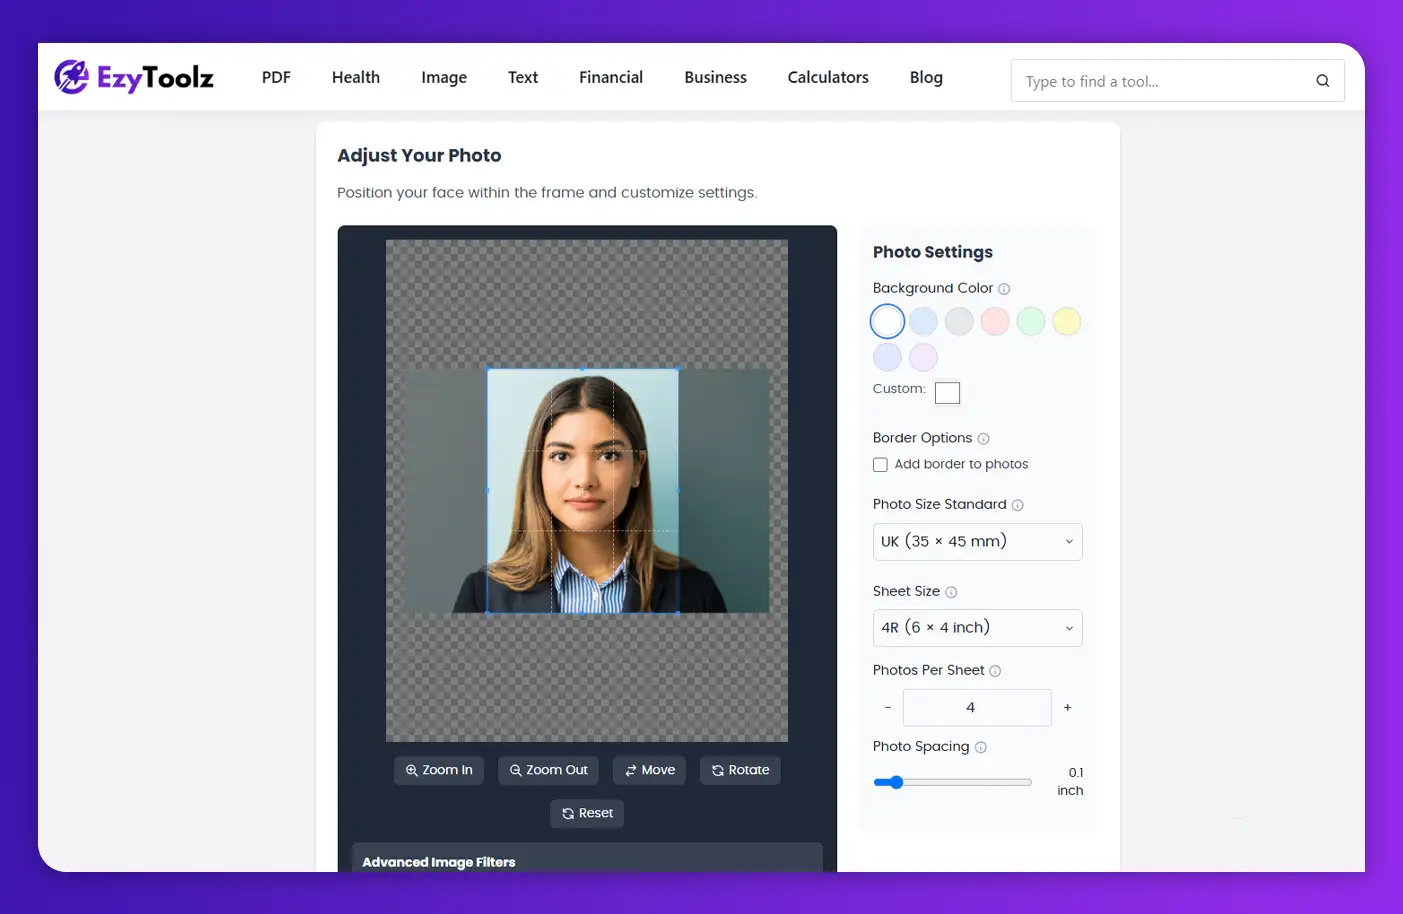
This is where you set the final photo dimensions and make any adjustments:
- Select your document standard from the dropdown — Indian Passport, NEET form, US Passport, Schengen Visa, or Custom Size.
- Crop the image — move and zoom until your head and shoulders sit correctly within the crop guide. The tool locks the aspect ratio automatically.
- Set background colour — most official documents require white. Select white from the colour options or use the custom colour picker for specific requirements.
- Adjust brightness and contrast (optional) — if the photo looks dark or flat, use the sliders to improve it slightly.
- Add a border (optional) — some ID photos look cleaner with a thin border. Enable and customise if needed.
Step 3 — Generate the Print Sheet
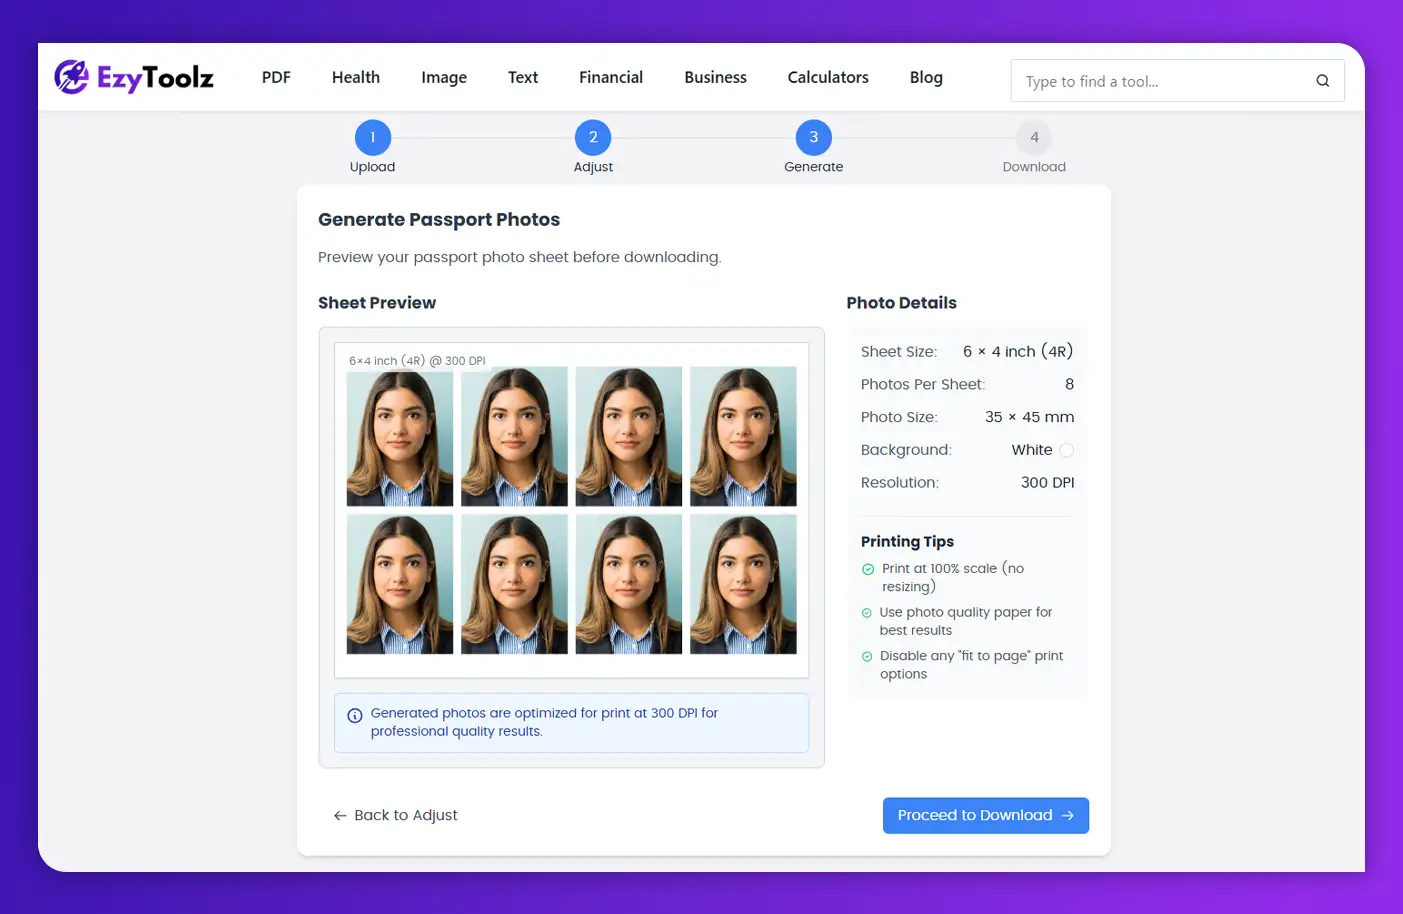
After cropping, the tool arranges multiple copies of your photo on a print-ready sheet:
- Sheet size: Choose 4R (6×4 inch), A4, or Letter. For home printing in India, A4 is most common.
- Photos per sheet: Select how many copies to fit on the sheet — typically 6 to 8 passport photos per A4 sheet.
- 300 DPI resolution: The tool outputs at print quality — photos will be sharp when printed at a local print shop.
- Real-time preview: The layout is shown before you download — check spacing and alignment before proceeding.
Step 4 — Download
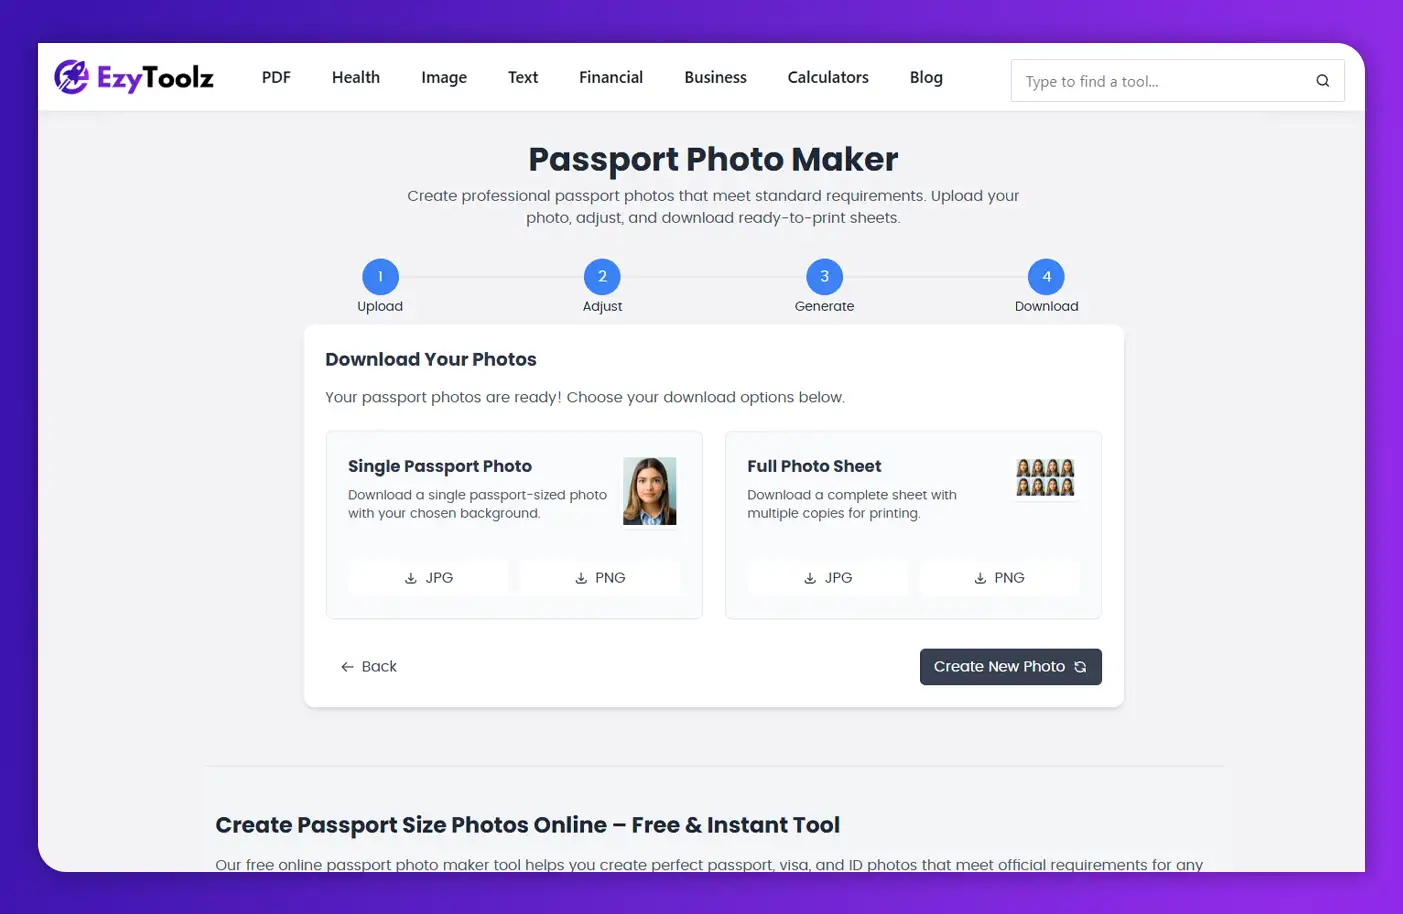
Two download options are available:
- Single photo: One cropped photo — use this for online applications, portals, or forms that ask for a digital photo upload (NEET, SSC, passport portal, DigiLocker).
- Full print sheet: Multiple photos arranged on one sheet — download as JPG or PDF and print at home or at any local print shop.
Frequently Asked Questions
Is the EzyToolz passport photo maker completely free?
Yes — completely free. No account, no subscription, no watermark. Upload your photo, crop it, download the result. As many times as you need.
Can I use this for NEET and JEE exam form photos?
Yes. NEET and JEE forms require a specific photo size (usually 3.5 × 4.5 cm or as specified in the notification) with a white background and file size under 200KB. Use the tool to crop to the right size, then use the EzyToolz Image Compressor to bring the file size under the portal limit.
Does the tool work on mobile?
Yes. The tool works in any mobile browser — Chrome or Safari on Android or iPhone. Upload a photo from your phone gallery, crop, and download. No app needed.
What if my photo background is not white?
Use the EzyToolz Background Remover (ezytoolz.com/image/background-remover/) to remove the background first. Then upload the clean image to the passport photo tool and set the background colour to white in the settings. Both tools are free.
What print size should I choose for printing in India?
Choose A4 sheet size. Set 6 or 8 photos per sheet. Download as JPG and take it to any local photo print shop or use a home printer. Print at 300 DPI for sharp results — the tool outputs at this resolution by default.
Can I use this for Indian passport and Aadhar card both?
Yes. Both require 3.5 × 3.5 cm size with white background. Select ‘Indian Passport’ from the dropdown — it sets the correct dimensions for both. Download the single photo for digital submissions and the print sheet for physical applications.
Is the photo stored on EzyToolz servers?
No. All processing happens in your browser. Your photo is never uploaded to or stored on any server. It stays on your device throughout.
No Studio, No App — Done in 2 Minutes
A passport size photo online free used to require a trip to a studio. The EzyToolz Passport Photo Maker handles it in your browser — correct dimensions for every Indian and international document, white background in one click, and a print-ready sheet to take to any print shop.
Open the tool, upload your photo, and download in under 2 minutes.